Replacing Cabinet Drawer Fronts
Posted by Admin on Oct 7th 2021
Replacing cabinet doors can be a simple enough process, but when it comes time to replace the fronts on your kitchen cabinet drawers? You may feel like this DIY refacing project is more difficult than replacing the doors, despite the much smaller size. There could be several reasons why you might think this way: the inaccessibility of the hardware and not knowing how the box, drawer front, and slides all fit together. Regardless, replacing the drawer fronts on your kitchen cabinets is a simple process. In this blog, we are going to take a look at how to complete this DIY project.
Required Tools:
- Drill or Screw Driver
- Wood Screws
- Hand Saw (For 3-Sided Boxes)
- Tape Measure
- Pencil
- Blanket or Soft Surface
Drawer Fronts and Drawer Boxes
Before you can get started, inspect your cabinets. Likely, you will either have a 3-sided or 4-sided drawer box. The main difference between them, the fourth wall, is obvious at first glance because you will be able to see where the drawer front is attached to the front wall of the drawer box. Alternatively, your drawer box may only be 3-sided, meaning that the drawer front is also the front wall of the box. Regardless of which style of drawers you have, the first step will be to take the drawer out of the cabinet and remove the hardware.
Drawer Box with 4 Walls
If you have drawers that are made from a separate drawer front and drawer box, then this project should be no problem at all. You will want to place the drawer on a soft surface, such as a blanket, so ensure that you do not accidentally damage the drawer. Once you have the worksurface prepped, carefully remove the old drawer front from the drawer box. Next, place the new drawer front face down on the soft surface.
Center your drawer box on the new drawer front. Use your tape measure or another measuring device to ensure that the box is properly centered. Next, loosely attach the drawer front to the drawer box and insert it back into the cabinet. Check and ensure that the fit is even before tightening the screws to secure the front.
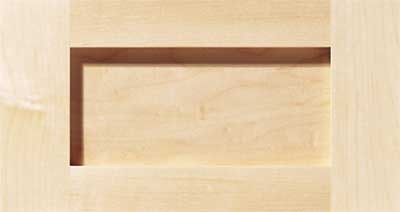
Be extra cautious if you are working with a recessed panel drawer front, as the screws can go through the panel if they are not driven into the stiles.
Drawer Box with 3 Walls
If your drawer box is constructed from 3 walls and uses the front as the 4th wall, then you will need a different method. In addition to the materials listed above, you may also need some clamps to hold the drawer steady as you saw. And so, with your soft surface prepped and clamps on if necessary, use the hand saw to trim to the drawer front. When you are finished, the drawer front should be flush with the rest of the box. Next, attach your drawer slides or glides so that the old drawer front is now the back wall.
Shop Shaker 5-Piece Drawer Fronts! |
From here, the process is the same as the 4-wall box above. Center your drawer box onto the new front, and then double-check that it is centered using your tape measure or another measuring device. Loosely attach the front to the box using screws, and then insert it back into the cabinet box to test the fit. When satisfied, tighten the screws to secure the front to the box.
Finishing Up
Whether you are just refacing your drawer fronts or if you are also replacing your cabinet doors, this can be a great time to upgrade your hardware. Even though they typically are out of sight out of mind, things like soft close hinges and drawer slides can add a luxe feel to your kitchen.
If you are unsure or need some assistance with your measurements, check out our guide to measuring your cabinet doors. This will give you a great starting point. Once you have your measurements, or if you need assistance, give us a call at 1-844-326-6680 or an email at info@cabinetdoormart.com. We look forward to helping you make your vision a reality!
Thanks for reading! Enjoy 5% off your next order with coupon code "BLOG5" |


