

Make a Towel Rack and Rail for Your Bathroom
Posted by Admin on Apr 12th 2020
Storage in your bathroom is very important for feeling comfortable, but sometimes it isn’t difficult to find enough space. Take advantage of your walls and make a practical and beautiful storage solution. This neat combination of a towel rack and a rail is perfect for those smaller bathrooms. It’s a quick and easy project for anyone with basic carpentry skills. You can follow this guide, making adjustments to your specific sizes, and we will tell you the steps for this great DIY project.
Tools You Will Need
You will need some power tools to make this rack, but you probably have everything you need already. If you need power tools, your local hardware store will often rent them out for the day.
- circular saw (or tenon/hand saw)
- jigsaw
- drill
- drill bits (19 mm)
- orbital sander (or rubber sanding block)
- tape measurer
- carpenter’s square
- chisel (or router if you have one)
- wood glue
- wood filler
- fine-grit sandpaper
- clamps
- screwdriver
- plastic bowel (or something with a rounded edge to mark cutting lines)
- pencil
- wood-wash
- paint/stain/varnish of your choice
- paintbrush
Materials Needed
Planed pine was used to make this towel rack but any wood can be used. Ideally, choose a type that has matching off-the-shelf dowel rods that you can use for the rails. Buy whatever standard sized wood is available in similar dimensions and adapt the design to meet your needs. We like brass screws because they are less likely to rust, but any screws may be used.
- Planed wood: 2 x 450 mm x 222 mm x 22 mm (about 17½ in x 83/4 in x 3/4 in) for the shelves; 2 x 422 mm x 222 mm x 22 mm (about 16½ in x 83/4 in x 3/4 in) for the sides; 2 x 406 mm x 69 mm x 22 mm (about 16 in x 23/4 in x 3/4 in) for the back.
- Dowel rod: 2 x 426 mm x 19 mm (about 163/4 in x 3/4 in)
- Brass screws: 4 x full thread 50 mm x 4,2 mm (about 2 in x 1½ in)
- Brass screws with Rawl Plugs: 4 x 60 mm x 8 mm (about 2¼ in x 3/4 in) if your wall is bricks or blocks and mortar, or any suitable drywall screws.
- Wood offcut: About 3/4 in or 20 mm thick.
Directions
Let’s get started.
Measurements and Cuts
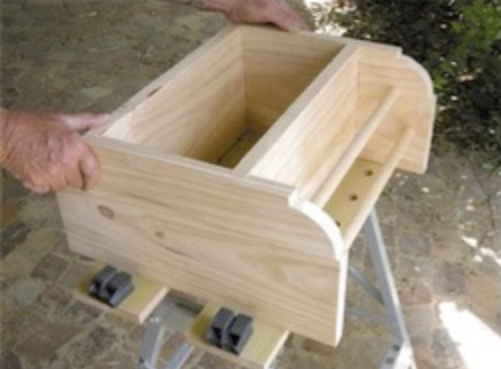
1. Working on the two side pieces use a carpenter’s square and a pencil to mark two 22 mm-wide (3/4 in) channels for the slightly longer shelves. One should be 70 mm (about 23/4 in) from the top and the other 130 mm (about 5 in) from the bottom. This will make the channels 206 mm (about 8 in) apart. Measure 15 mm from each end and draw a 10 mm (about 1/3 in) line. Draw a second line 70 mm (about 23/4 in) from the opposite corner. Draw a curved line between these two points (see pix 2 and 4).

2. Set the depth of your circular saw to about 1/3 in (8 mm) and carefully cut along the lines marked for the housing channels on both sides. You can also use a tenon saw although it will be more difficult to be accurate using a handsaw.

3. Use a chisel to remove the wood between the two sawed lines. Work carefully to avoid gouging the wood.

4. Wrap sandpaper around the wood offcut and smooth the four chiseled channels. Cut the four corners along the lines you have drawn using a jigsaw.

5. Use a 19 mm (about 163/4 in) flat wood bit or a multi-angle drill bit to make 10 mm-deep (a little more than 3/4 in) holes to accommodate the dowel rods. If the diameter of your dowels is different be sure to use the correct sized bit.

Assembly
6. Now assemble the towel rack. Squeeze a little wood glue into the four drilled holes and four channels. Slot the ends of the shelves into the channels and the dowels into the holes.
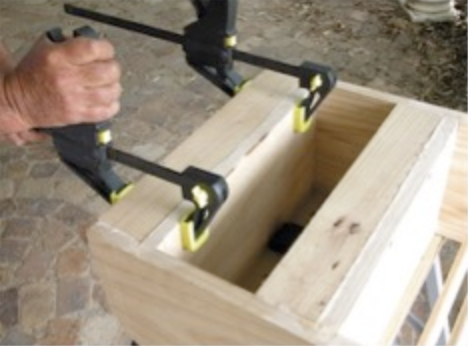
7. Clamp the wood between the shelves.
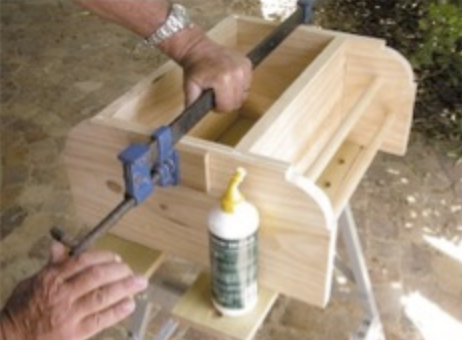
8. Now glue and clamp the two back pieces. When the glue has dried screw the underside of the shelves to the edge of the wood to hold them firmly in place. You can position them more or less where the bottom of the clamps are in this picture.
9. When the glue has dried remove the clamps. If there are any gaps where the pieces of wood join one another fill these with a little wood filler.
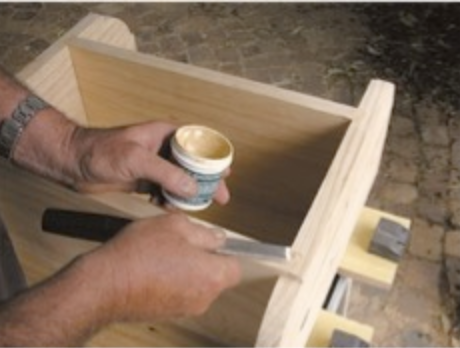
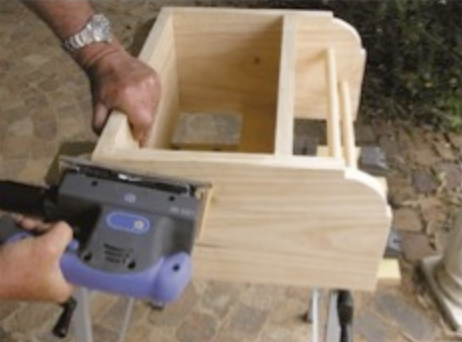
10. Use screws or a nail gun to add extra support to each seam.
11. Smooth any rough edges and excess wood filler using the orbital sander or a sanding block to give it a nice, smooth finish.
Finishing Touches
Before you mount the rack to the wall, paint, stain and/or seal, or soften the wood color with wood-wash. Try matching or coordinating the finish with your bathroom cabinets. If you want to continue this DIY project, you could install some custom cabinet doors to upgrade your new towel rack and rail.
Keep in mind, this shelf is all about stability. Check to make sure the rod is sturdy and can withstand a little tugging. When you mount your rack to the wall, drill directly into studs or use appropriate anchors.